The Best Homemade Chicken Noodle Soup
/Sharing my favorite recipe that is almost as good as my mom’s.
Read MoreSharing my favorite recipe that is almost as good as my mom’s.
Read MoreOn our three and a half hour drive from LA to Pismo Beach, we stopped halfway to eat lunch at the cutest little cafe that was RIGHT ON the beach. If you find yourself in Santa Barbara, you must eat here!!
Read MoreThe BEST recipe for cream cheese frosting ever, but you have to follow the measurements exactly!
Read MoreQuite possibly the most addicting dip ever (and the perfect dish to bring to holiday parties!).
Read More
Dinner has been incredibly easy and appetizing the last few nights, and it’s all because of Hello Fresh.
Have you ever used them? PJ’s cousin Lauren recommended we try it out, after raving about how she’s been doing it for her family for a while now, and even gave us some coupons for major discounts. After thinking it over for a week, we finally decided to make the jump and place our first order of Hello Fresh.
For starters, this isn’t a sponsored post, I just really like this meal service. I mean, any opportunity to make dinner easier each night I can get on board with, and bonus points if it’s actually easy and tasty, which every meal we’ve made so far has been. Like, really really delicious and actually really fun to make. I made a buffalo panko chicken the other night and PJ revealed he thought it was better than his lunch he had that day (which was from a favorite local joint).

Tonight’s dinner was pork and veggie bibimbap (pictured above), which was, you guessed it, SO GOOD. The thing about the recipes we’re receiving is they’re all so easy to make, with every day ingredients (for the most part) and they take all the guessing and hard work out of thinking what to make for dinner every night. We did the math, and it’s definitely way cheaper for our family of five to eat these meals as opposed to going out to eat, but also, in some cases, cheaper than buying a bunch of groceries to make dinner. Plus, where we’re at in our lives right now, we’ll take anything easy if we can help it.
We’re doing the four nights a week for four people, but the servings are such good sizes that they’ve been enough for all five of us. Again, this post isn’t sponsored, we’re just having fun with these recipes and the convenience of Hello Fresh right now. How long will we be using the meal service? TBD, but for now, it’s easy and delicious.
And at the end of the day, can you really ask for more?

For years, we’ve only put one thing in our coffee…
Well, I should be more specific: I have only put one thing in my coffee for the last 5+ years, which is International Delight’s Sweet Cream. Have you ever tried it? It tastes like vanilla ice cream mixed with a ginormous hug right in your mug. I equate the feeling I get from drinking it in my coffee to the same feeling of wrapping up in your favorite, old cozy sweater. In short, dear reader, it’s marvelous.
PJ also uses ID’s Sweet Cream, but he’ll usually add some heavy whipping cream or half n half in his mug, too. He used to go all out and add salt along with it, but over the years he’s simplified his coffee routine down to the essentials.

Our coffee time is our happy time. We usually drink a cup in the morning when we first wake up (I’ve sadly gotten to where it’s borderline impossible for me to function for the day if I don’t immediately start it with a cup of coffee) and then a one in the middle of the day for a boost of energy. Sometimes, if we’re working late, we’ll put a pot on after the kids go to bed. I’m actually drinking some as we speak.
What about you? What do you put in your coffee? Honey? Milk? SweetN’ Low? Cream and sugar?

A question for the ages!
To some, in might be common knowledge, but since I’ve been cooking more and more for our family the last couple of years, I’ve also been looking more into different “myths” I learned about cooking growing up (washing chicken before cooking it doesn’t really have to be done!).
One of those myths was rinsing pasta noodles after draining them. It was one of those things I had always heard from one source or another that it didn’t necearrily have to be done, but I was never entirely sure. Until today!
So do they have to be washed after you cook and drain them? In short, no. But also, sometimes.
Sarah Jampel from Bon Apetit explains that “Rinsing noodles removes starch from their surface, thereby making it more difficult to get any kind of sauce to cling.” That explanation makes sense, right?. But what about the times when you do have to rinse them?
“If you’re making a dish that will be served chilled or at room temp—think cold soba, rice noodles, pasta salad—you do want to rinse so that you get toothsome (sorry) individual strands rather than one big gummy clump” Sarah says. Again, make sense!
So to wrap things up: No, don’t rinse your noodles unless you’re making a dish that specifically calls for it. Simple as that!
Is there anything better or more comforting than a warm piece of cinnamon bread?
Read More
I have to admit, I had never heard of this dish before.
I received a book that features a bunch of unofficial recipes from famous movies (the New York-style pastrami sandwich from Katz’s in When Harry Met Sally, beef bourguignon from Julie & Julia, etc.) from my sister in law a few Christmas’s back, and have been meaning to make some of the recipes for a while now. It’s called “Eat What You Watch: A Cookbook for Movie Lovers” by Andrew Rea and it’s filled with the best recipes you always wanted to know how to make from the best movies you’ve watched for years.
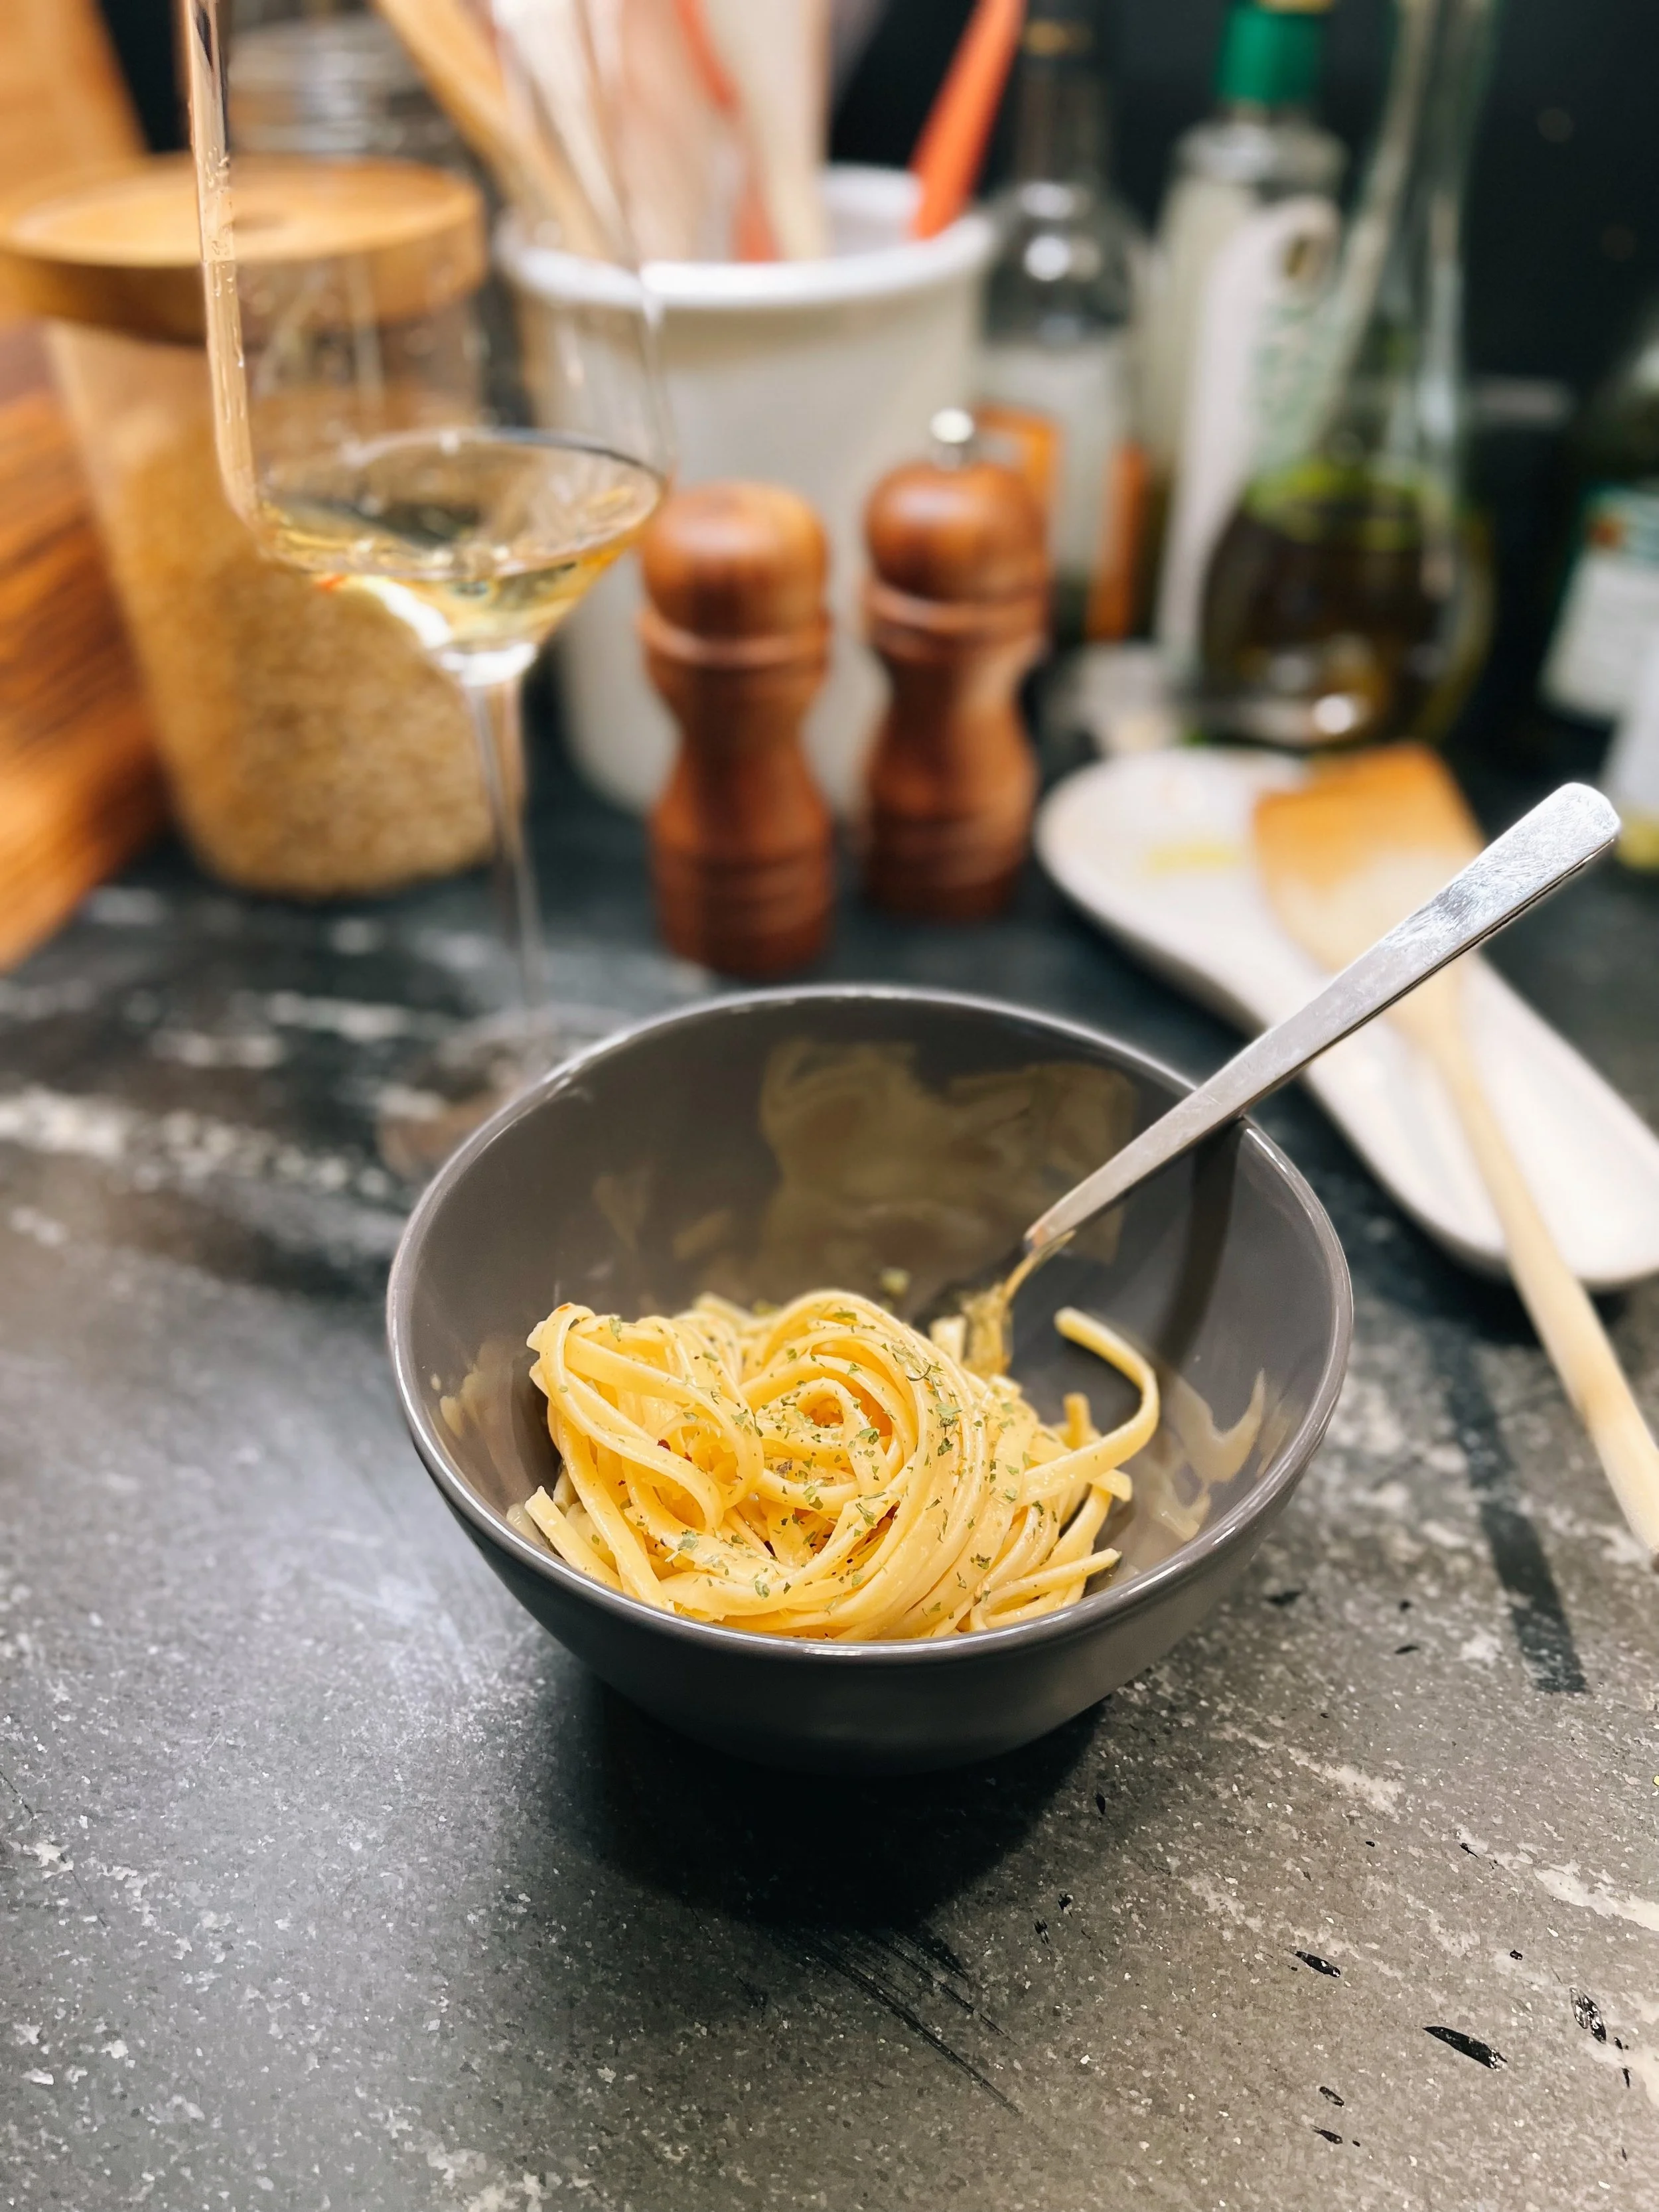
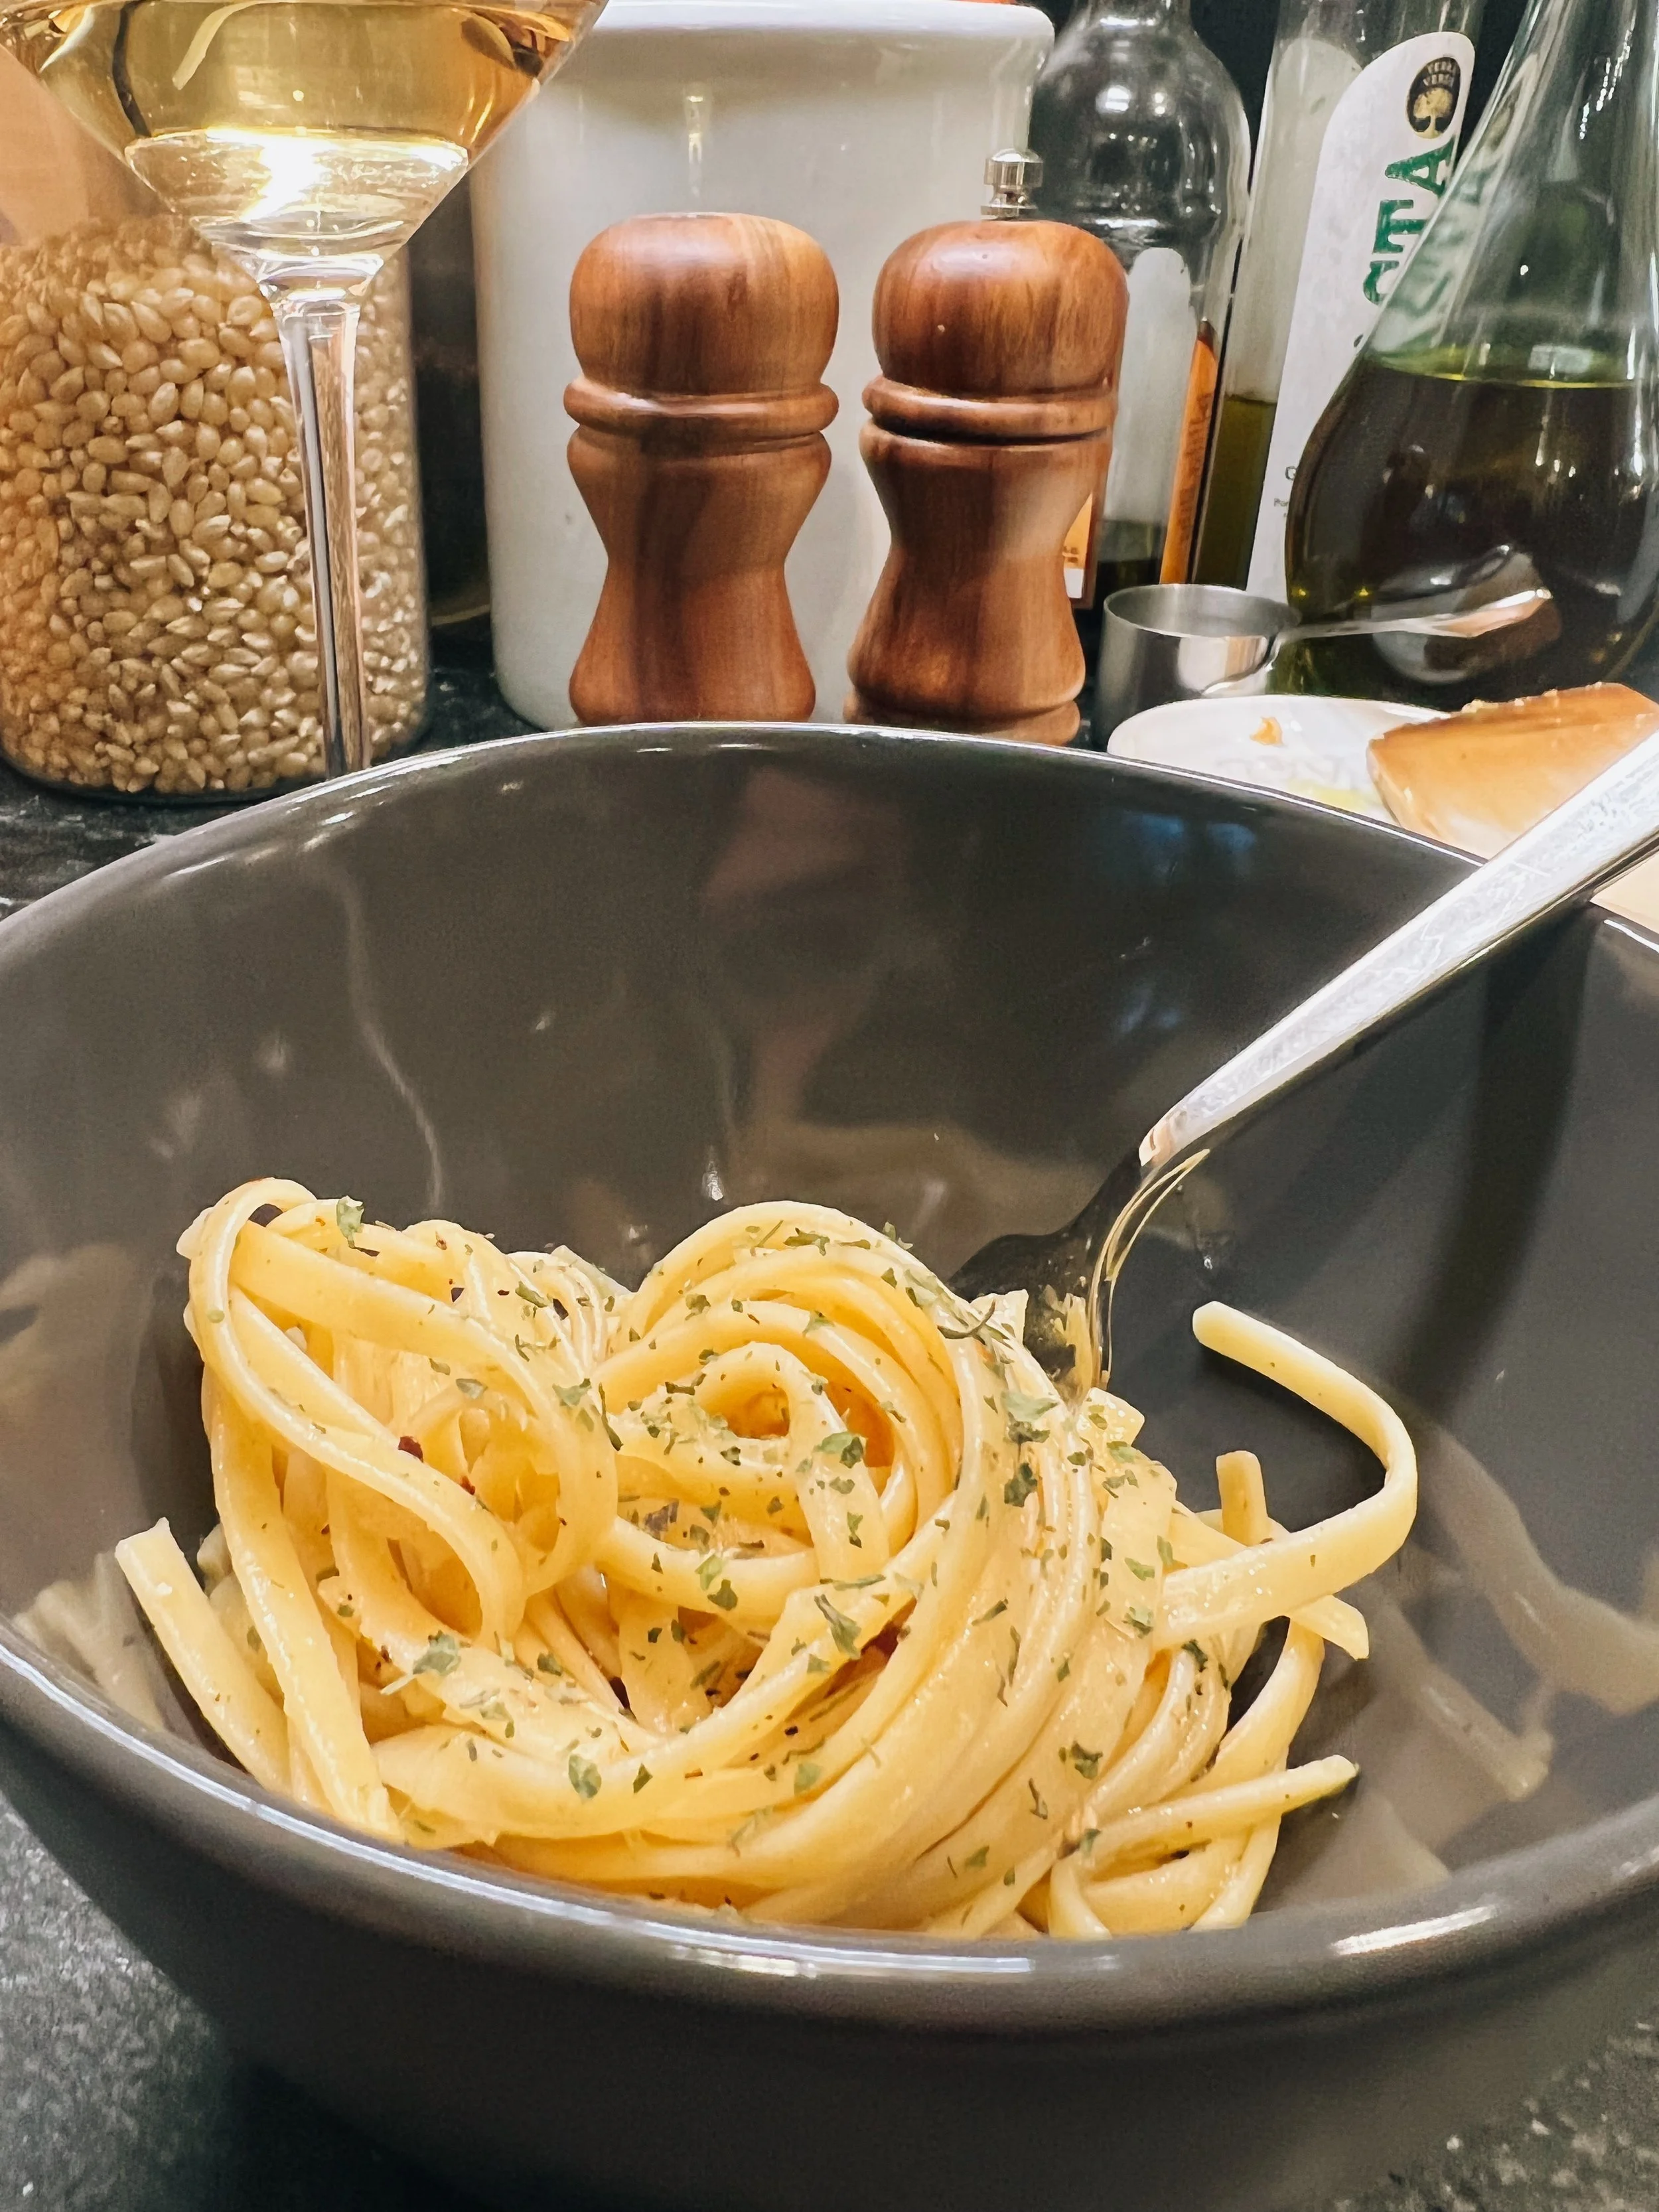
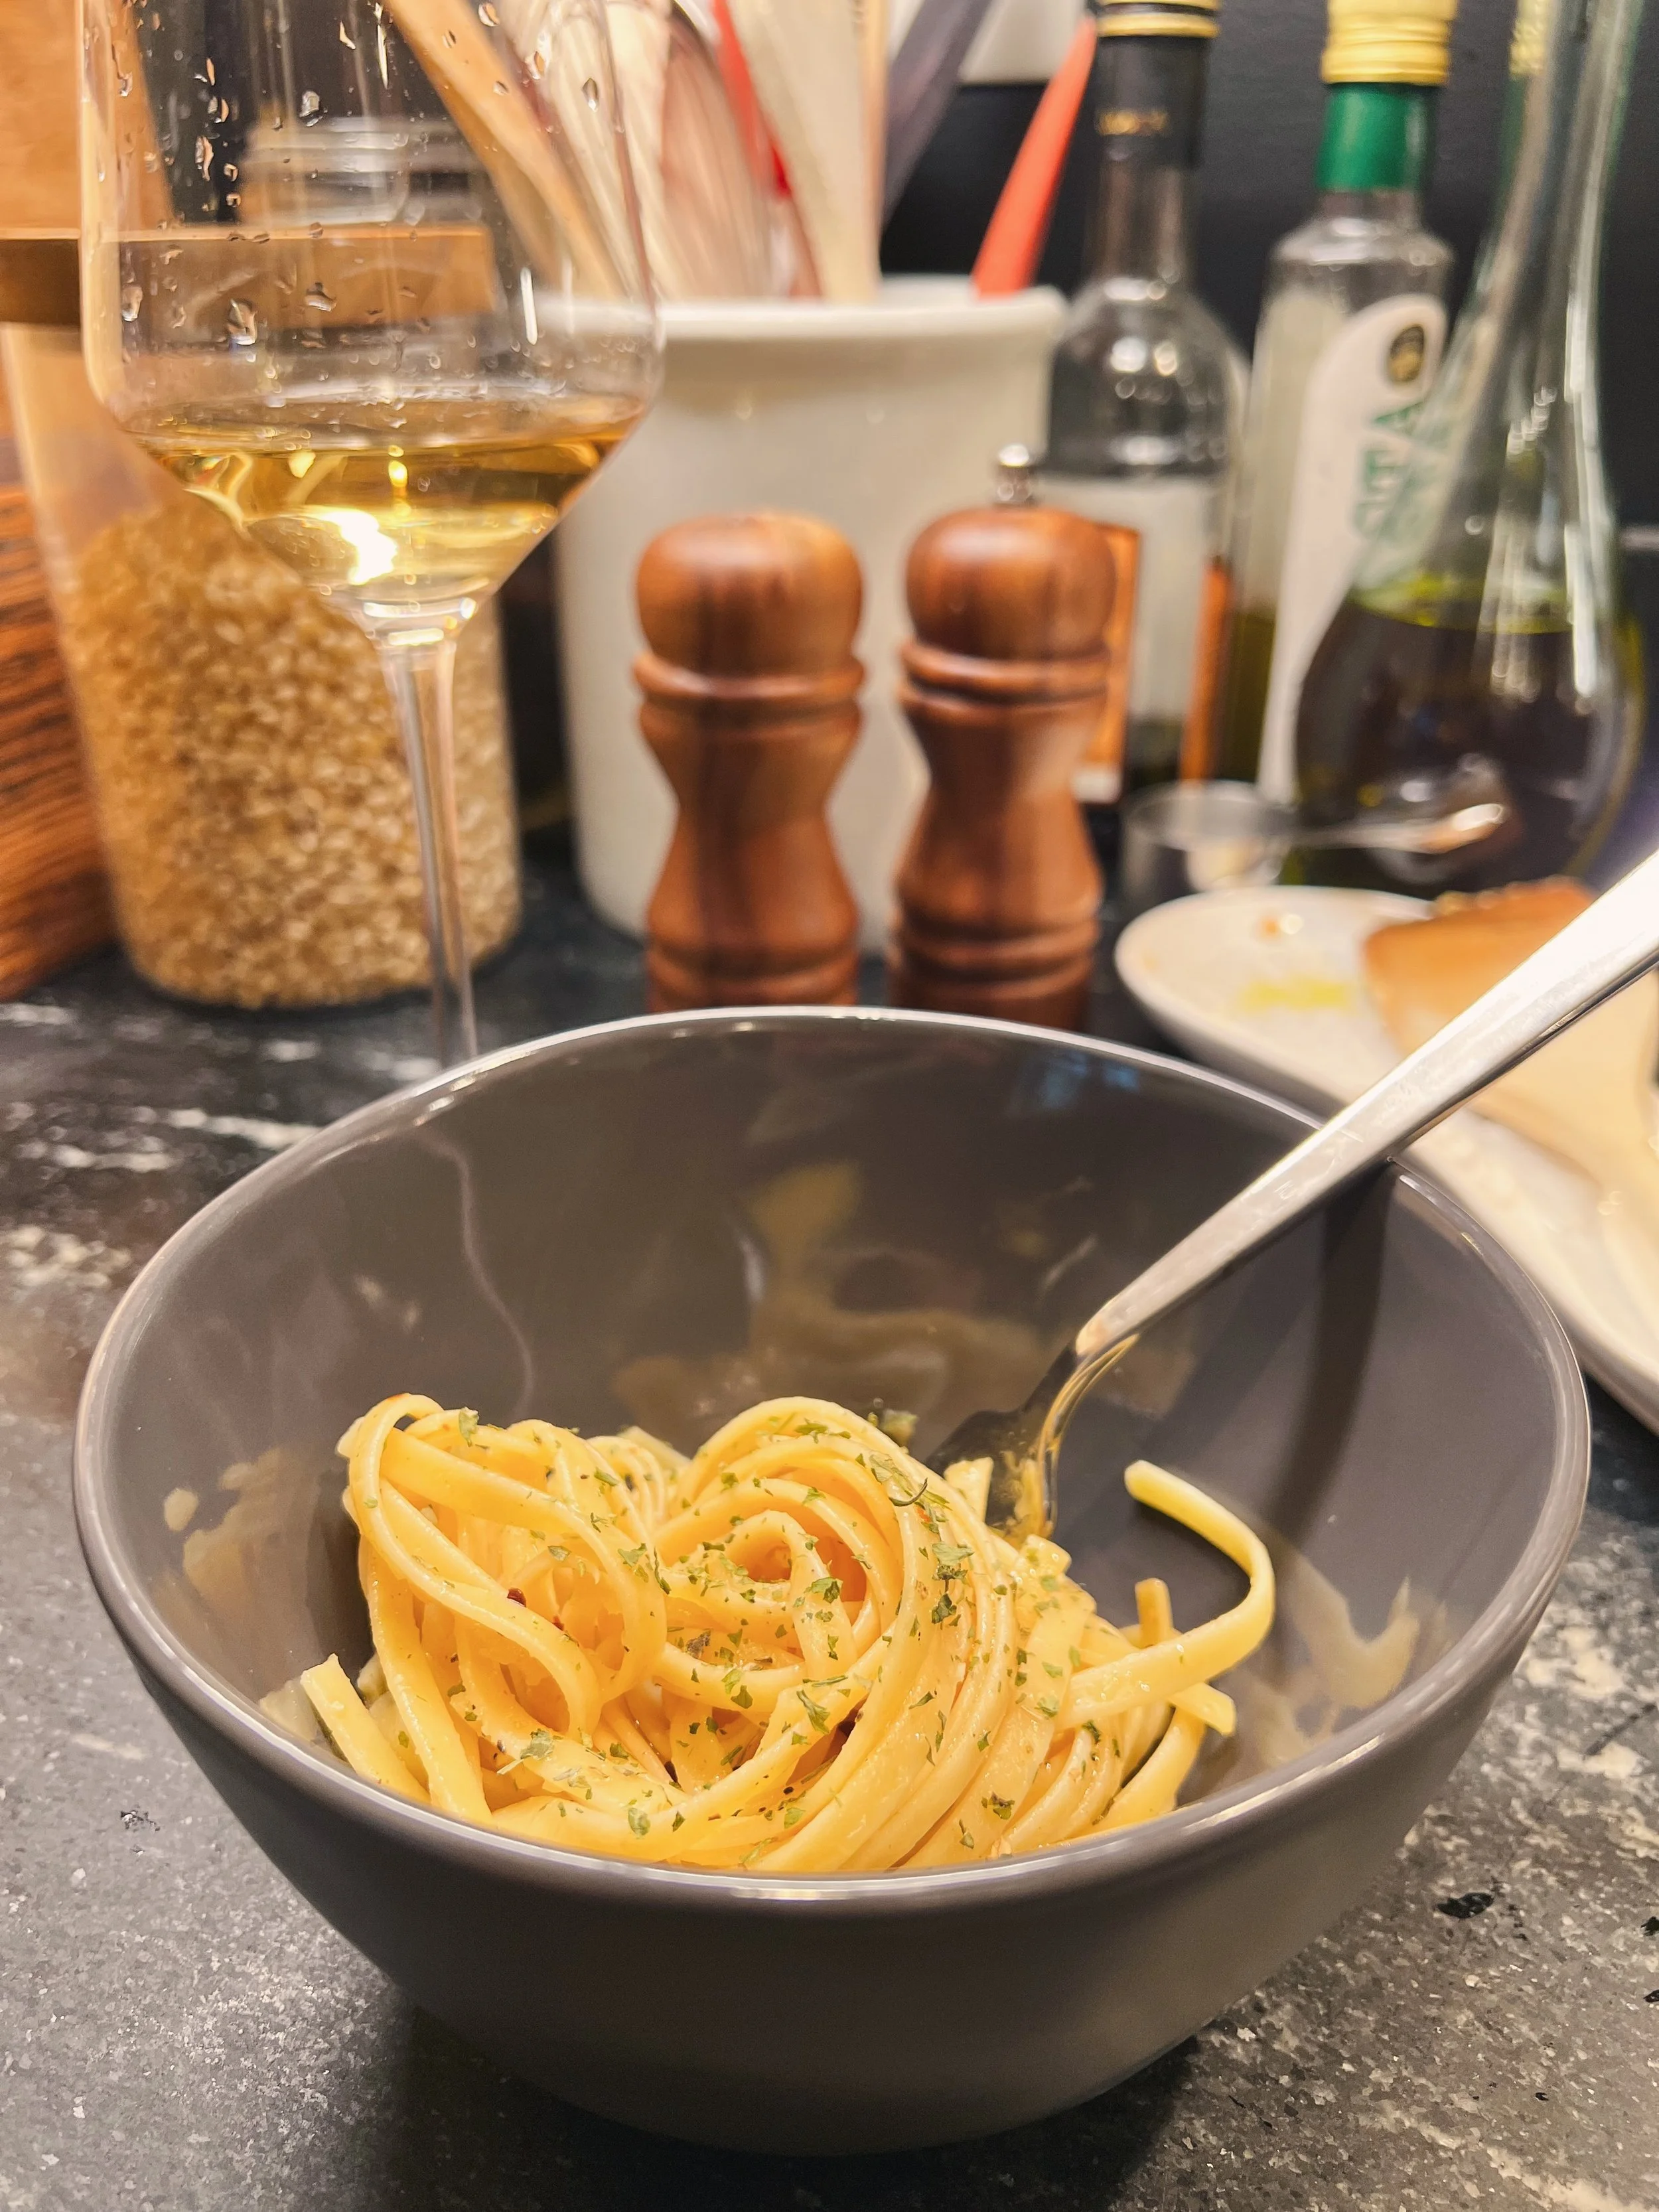
I was flipping through the cookbook the other night when I came across this pasta dish that looked delicious. I love pasta anything, so I knew immediately this would be the first recipe from the book that I would make. And you know what? It was a hit!


PJ and Riah both loved it, which was great in and of itself, but even better because it’s so quick and easy to make. Here’s what you’re going to need, taken directly from the book:
½ cup good-quality olive oil
8 large garlic cloves, very thinly
sliced
1 teaspoon red pepper flakes
½ pound dried linguine
½ lemon
Salt and freshly ground black
pepper
½ cup finely chopped parsley
In a large skillet, heat the oil over medium heat until barely shimmering. Add the garlic and cook, stirring constantly, until softened and turning golden brown around the edges, taking care not to let the garlic burn.
Add the red pepper flakes and remove the skillet from the heat.
Meanwhile, bring a large pot of salted water to a boil. Add the pasta and cook until just shy of al dente.
Drain the pasta, reserving ¼ cup of the pasta water.
Return the skillet to medium heat and add the drained pasta and a splash of pasta water.
Continue cooking the pasta, tossing frequently and adding water as needed, until the pasta is al dente and well coated in a creamy sauce.
Squeeze the lemon over the pasta, season to taste with salt and pepper, sprinkle with the parsley and serve.

If my mom, who is the queen of salt and pepper and puts it on any meal she eats before she’s even tried it, thinks this soup is delicious and didn’t feel the need to add additional salt and pepper, you know it’s a good recipe.
I was looking for a quick and easy chicken tortilla soup recipe to make using the rest of the salsa crockpot chicken that PJ had made the night before, when I came across this one from Spendwithpennis.com. It’s super easy to make and it’s oh so good. Again, my mom is the pickiest eater ever, so imagine how surprised I was when she texted me the photo above (the only picture I have of the soup- oops) and said “Oh my God it’s so good!” to which I replied, “It needs more salt and pepper!!”
Then, she sent what might have been the sweetest text message I’ve ever received, one that let’s me know that moms are in fact and without a doubt, truly the best:
“NO!!!!!!! And you know how much I love salt! it is perfectly seasoned for me. It’s just the right amount of cumin.”
There you go. It’s Lila approved. And mom’s really do know best, don’t they?
Here’s what you’re going to need, directly from Spendwithpennies.com:
1 tablespoon olive oil
1 onion chopped
3 large cloves garlic minced
1 jalapeño diced and seeded
1 teaspoon ground cumin
1 teaspoon chili powder
14 ½ ounces crushed tomatoes
1 can diced tomatoes with chilis such as rotel
3 cups chicken broth
14 ½ ounces can black beans rinsed & drained
1 cup corn drained if canned
2 chicken breasts boneless, skinless
¼ cup cilantro chopped
1 lime juiced
1 avocado sliced, for garnish
Heat ¼ cup olive oil over medium-high heat a small pan. Add tortilla strips in small batches and fry until crisp. Drain and salt.
Heat olive oil In a large pot over medium heat. Add onion, garlic and jalapeño and cook until onion is softened.
Add remaining ingredients and simmer 20 minutes or until chicken is cooked through.
Remove chicken and shred. Add back to the pot and simmer for 3 minutes.
Spoon soup into bowls and and top with tortilla strips, lime wedges and sliced avocado.
Hope you enjoy it as much as we all did!!

I found PJ’s new favorite dinner!
PJ isn’t a big fan of red sauces these days. For some reason, sometime last year he started disliking spaghetti (which is crazy to me because I could literally eat it every night), so he asked me to stop making so many red pasta sauces for dinner (I used to make them quite often because they’re so damn easy).
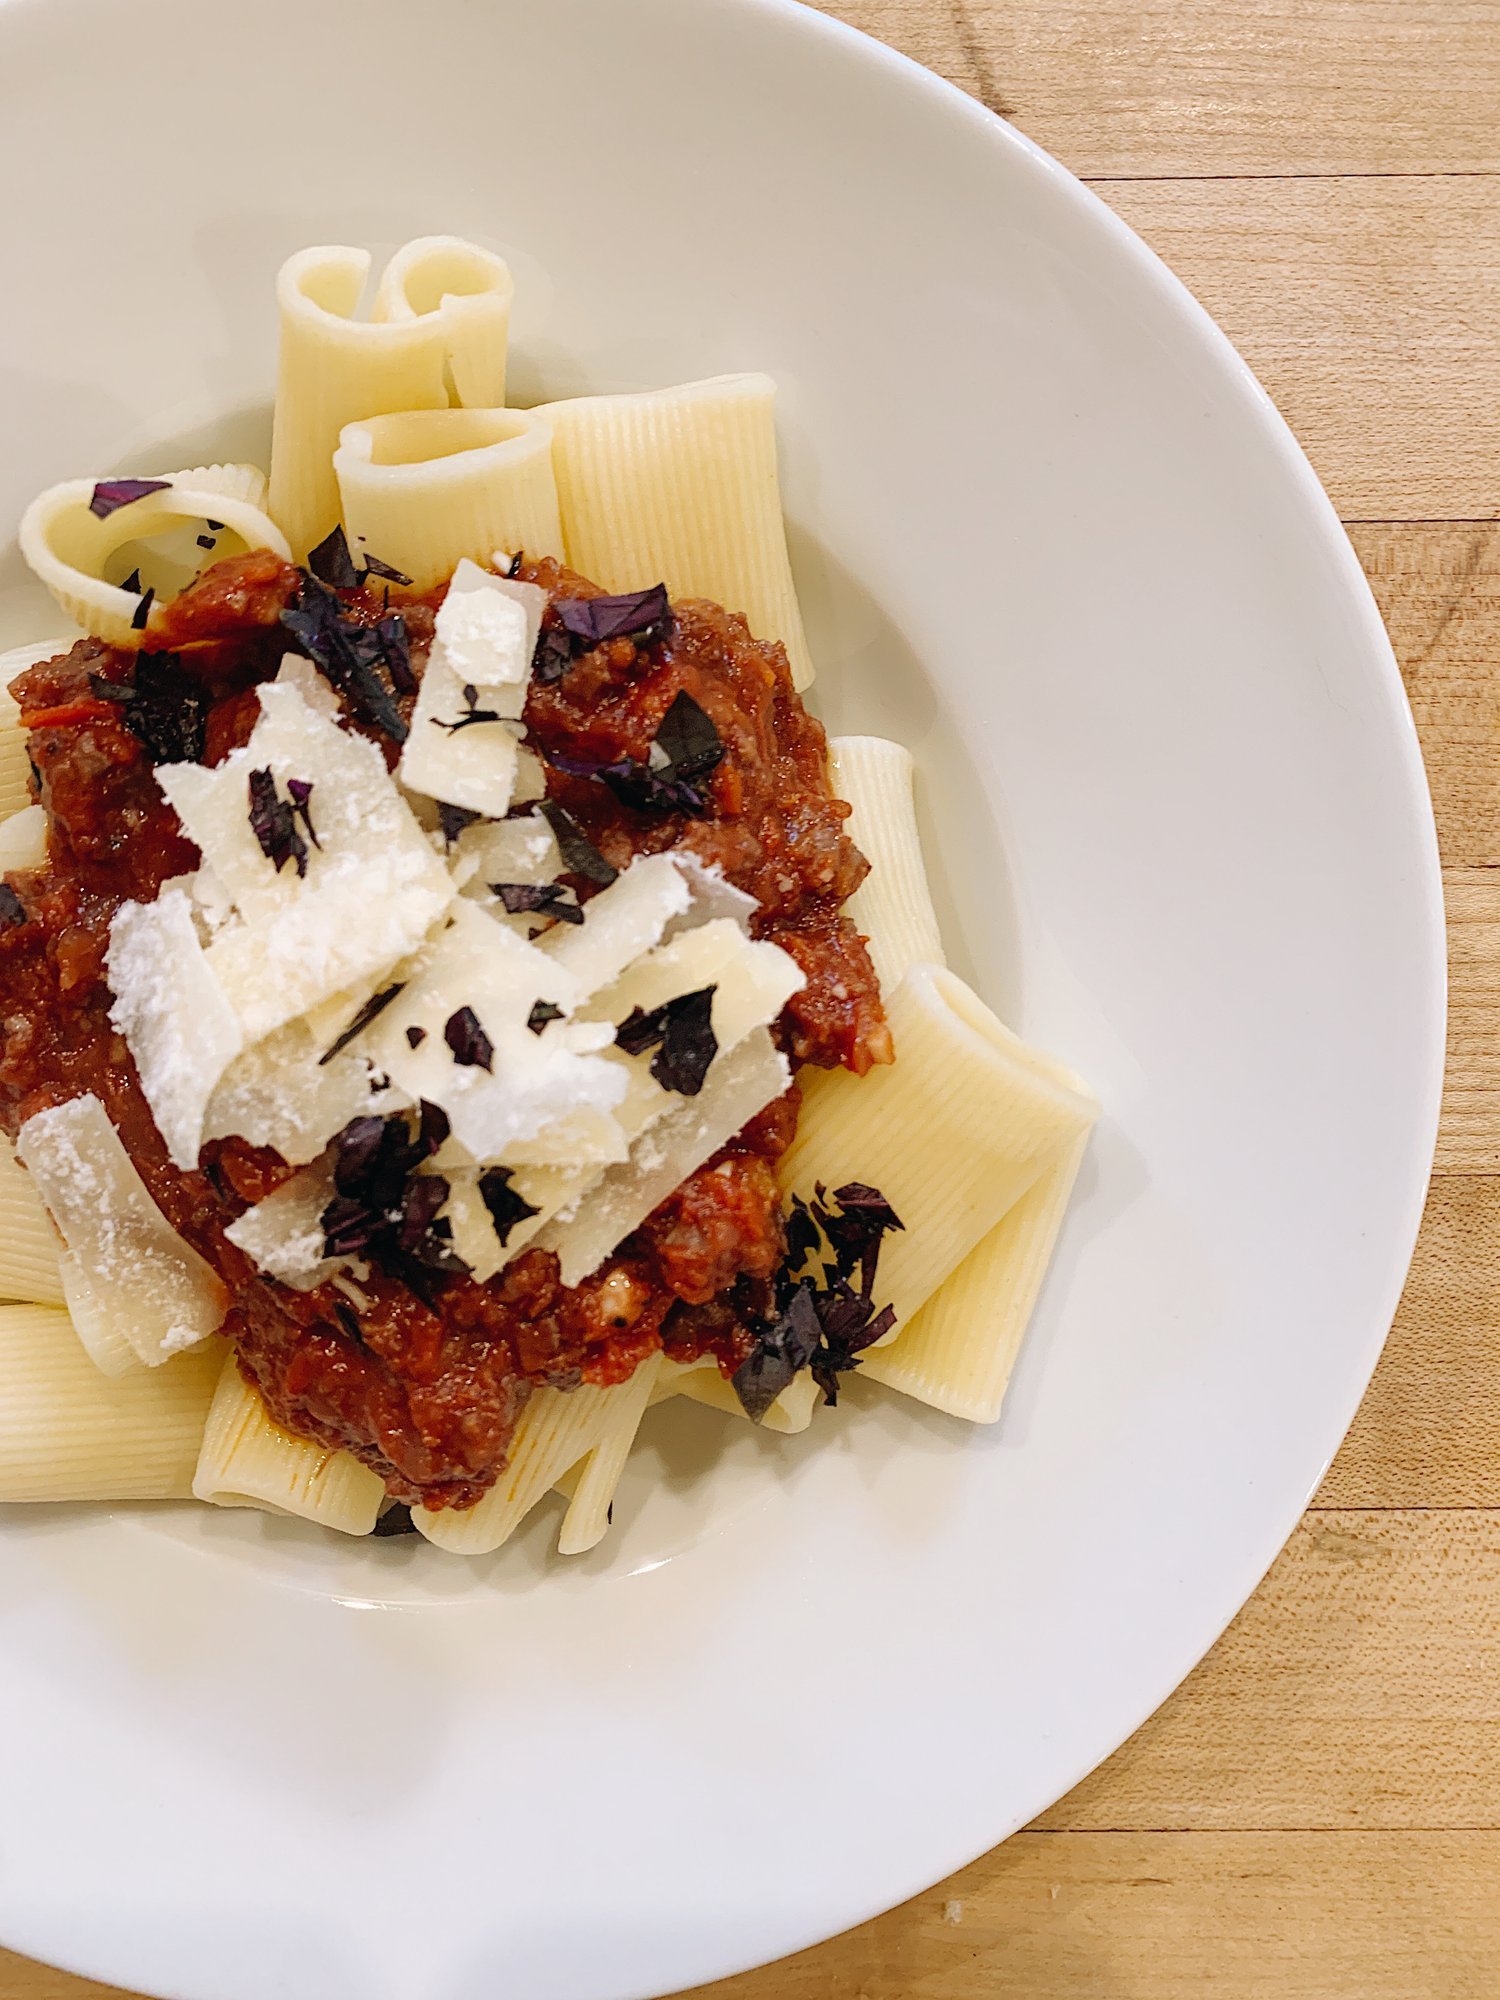
But a few weeks back I was in a pinch and had to think of something to make for dinner rather quickly. I saw we had a package of sausage (randomly) in the freezer, so I Googled different pasta dishes to whip something up in time for dinner. I was craving a sort of red wine sauce, probably from all of the inspiration I’m getting from watching Stanley Tucci’s Italy food docuseries on HBO Max. I came across this recipe from Pinch of Yum and it sounded so good and checked all the boxes I was looking for.
And it turned out great! It’s a tasty, hearty pasta perfect for the colder days ahead. The red wine and balsamic vinaigrette give it a flavorful and lively kick. Full disclosure: I didn’t add carrots or celery like the recipe calls for because I have a weird food allergy to both of them that makes it feel like my throat is closing up every time I eat them, but it was still super yummy. We also used purple basil as a garnish on top (fresh from our garden at Ocoee Farm!), which is that black-looking stuff sprinkled on it.
Here’s what you’re going to need:
1 tablespoon butter
1–2 cloves garlic, minced
half of a yellow onion, minced
2 stalks celery, minced
2 carrots, minced
12 ounces spicy Italian sausage (casings removed – just the ground meat)
1 teaspoon dried oregano
1/2 teaspoon red pepper flakes
1 1/2 teaspoons salt
1/2 teaspoon black pepper
1/2 cup red wine
1 28 ounce can San Marzano tomatoes, including their juices
1/4 cup balsamic or Italian dressing (optional – for some zing!)
10–12 ounces rigatoni
butter, Parmesan, or basil for topping
Heat the butter in a skillet over medium high heat. Add the garlic, onion, celery, and carrots – sauté for 10 minutes or so, until the vegetables are very soft.
Add the ground sausage, oregano, red pepper flakes, salt, and pepper. When the sausage is fully cooked, add the wine and let it sizzle out.
Add the tomatoes and optional dressing – simmer for 20-30 minutes so the sauce reduces a bit.
Cook the pasta according to package directions. Add the pasta to the sauce and stir gently to combine. It should be saucy but not runny. Transfer to a large serving dish and top with Parmesan and parsley or basil. Serve with more wine!

So, so good. Enjoy! x

One of my favorite parts about this season is the permission we finally have to make yummy, warm, pumpkin-baked goodies.
Okay, we obviously don’t need permission; we can bake whatever, whenever we want! But it helps capture the spirit of fall and what makes this season so great. Fall is all about feeling warm and cozy and fuzzy, and that’s exactly what this chocolate pumpkin loaf from Food52 tastes like. Food52 always shares the most delicious looking recipes, and they seem to always post exactly what I’m in the mood to make, even before I know what I want. Funny how that works out…

It’s not too sweet, it’s not too chocolatey, it’s not too pumpkiny, it’s just the right amount of all three whisked together, and our family has been snacking on it for the last couple of days. My advice? Best eaten warmed up and with a lot of butter on top.
Does it get better than warm bread with melted butter on top? Especially this time of year? The answer is no. No it doesn't.

Full transparency: I baked ours for the recommended time of an hour and it was a little dry. I could have probably taken it out 5-10 minutes earlier and it would have been perfect, so depending on your oven (you know it best!), you may want to take your loaf out a little sooner than an hour. If you don’t like your bread soft and moist, then an hour bake time should be just right.
Here’s what you’re going to need, straight from Food52.com.
4 eggs
1 1/2 cups sugar
1/2 cup vegetable oil
15 ounces canned pumpkin
1 cup semisweet chocolate chips
3 cups all-purpose flour
1 teaspoon baking soda
1 teaspoon baking powder
1/2 teaspoon salt
1 teaspoon cinnamon
1/4 teaspoon nutmeg
1/2 teaspoon ground ginger
Preheat the oven to 350° F. Grease two 8- by 5-inch loaf pans.
In a large bowl, whisk together the eggs, sugar, vegetable oil, and canned pumpkin.
In a heatproof bowl, melt the semisweet chocolate chips over a double boiler or in the microwave until fully melted. Set aside.
In a medium bowl, whisk together the flour, baking soda, baking powder, salt, cinnamon, nutmeg, and ginger.
Add the flour mixture to the pumpkin mixture and stir until just combined.
Add 1 cup of the pumpkin batter to the melted chocolate chips and stir until smooth and well-mixed.
Pour a 1-inch layer of the pumpkin batter in the bottom of each of the prepared loaf pans. Spoon a layer of the chocolate batter on top of each pan, taking care to keep the chocolate from spreading to the very edges.
Divide the remaining pumpkin batter between both pans and carefully smooth it over the chocolate filling so that it completely covers the chocolate.
Bake for about 1 hour. Remove from oven and let cool in the pan for 10 minutes before turning out on onto a wire rack to finish cooling completely.


Happy fall, and happy baking!!! xx

The other night, at 10p, and after watching Zoe Bakes on Magnolia, I got the sudden urge to make something delicious and sweet. So that’s what I did. Again, at 10p at night.
But what to make? I’m honestly not sure why I bought so many cans of biscuits, but I opened our fridge and saw 4 or 5 staring me in the face, so I decided to start there. And after seeing Zoe make something with cinnamon and sugar on her show, I thought cinnamon pull apart bites sounded absolutely perfect.
A quick Google search, and a few seconds later, I found this recipe from Pillsbury. Super quick, easy, and just what I think we all wanted on a late, rainy Saturday night. Here’s what you’re going to need…
1/2 cup sugar
1/2 cup brown sugar
2 1/2 teaspoons cinnamon
2 cans (6 oz) refrigerated Pillsbury™ Flaky Layers Buttermilk Biscuits (5 Count)
1/3 cup butter, melted
Heat oven to 400°F. Generously grease 8x4-inch loaf pan (do not use dark-coated pan). In small shallow bowl, combine sugar and cinnamon; mix well.
Separate dough into 10 biscuits; cut each into quarters. Dip each quarter into melted butter; roll in sugar-cinnamon mixture. Arrange in greased loaf pan.
Bake 19 to 25 minutes or until deep golden brown and center is baked through. Cool 2 minutes. Loosen edges; remove from pan. Place on serving plate. Serve warm.

Since it was so late when we made them, we only had a few bites and then heated it up the next morning for breakfast. Sugary, sweet, sticky, and so good. Hope you enjoy them as much as we did!
The Property Lovers is a daily blog by PJ and Thomas about our adventures as husbands and dads living in our small hometown, life in our 100 year old Craftsman, and fixing up our farm. Welcome!
To learn more, click here.
We may earn a small commission on some of the products we link to on the blog, at no cost to you. We appreciate your support and understanding, and would never recommend a product we didn’t love. Thank you.
Powered by Squarespace.